
This project started as a single-room addition off the main floor — a new four-season space built out over a walkout-grade backyard, tied structurally and visually into an existing two-storey brick home. On paper it was a clean scope: new framing, a patio door and skylights, a gas fireplace, ductless heating and cooling, and a composite deck. In practice, an addition like this one only goes as smoothly as the house lets it, and this house had a few things to say once the walls came open.
The brief
Build a fully framed, insulated main-floor addition on an elevated post-and-beam structure, supported on concrete piers, tied into the home's existing roofline. Scope included a new patio door, two skylights and the re-installation of existing windows in new locations, a gas fireplace bump-out, a ductless mini-split for heating and cooling, all new electrical, and a covered composite deck with stairs down to grade. Every finish — siding, soffit, fascia, drywall, flooring — had to read as part of the original house, not an obvious add-on.
What the excavation turned up
Before framing could start, the footing holes had to go in — and that's where the first surprise showed up. Partway through digging, the crew hit a 4-inch white PVC pipe tied into the home's eavestrough drainage system. It needed couplings and a section of new pipe to repair, and the repair had to happen before the next rainfall or the open footing holes would flood. Excess asphalt and debris left in the soil slowed the dig further, and power to an existing backyard sauna was shut off at the panel as a precaution while the crew worked around the exposed line. A Japanese maple and an existing planting bed were relocated out of the footprint before work continued.
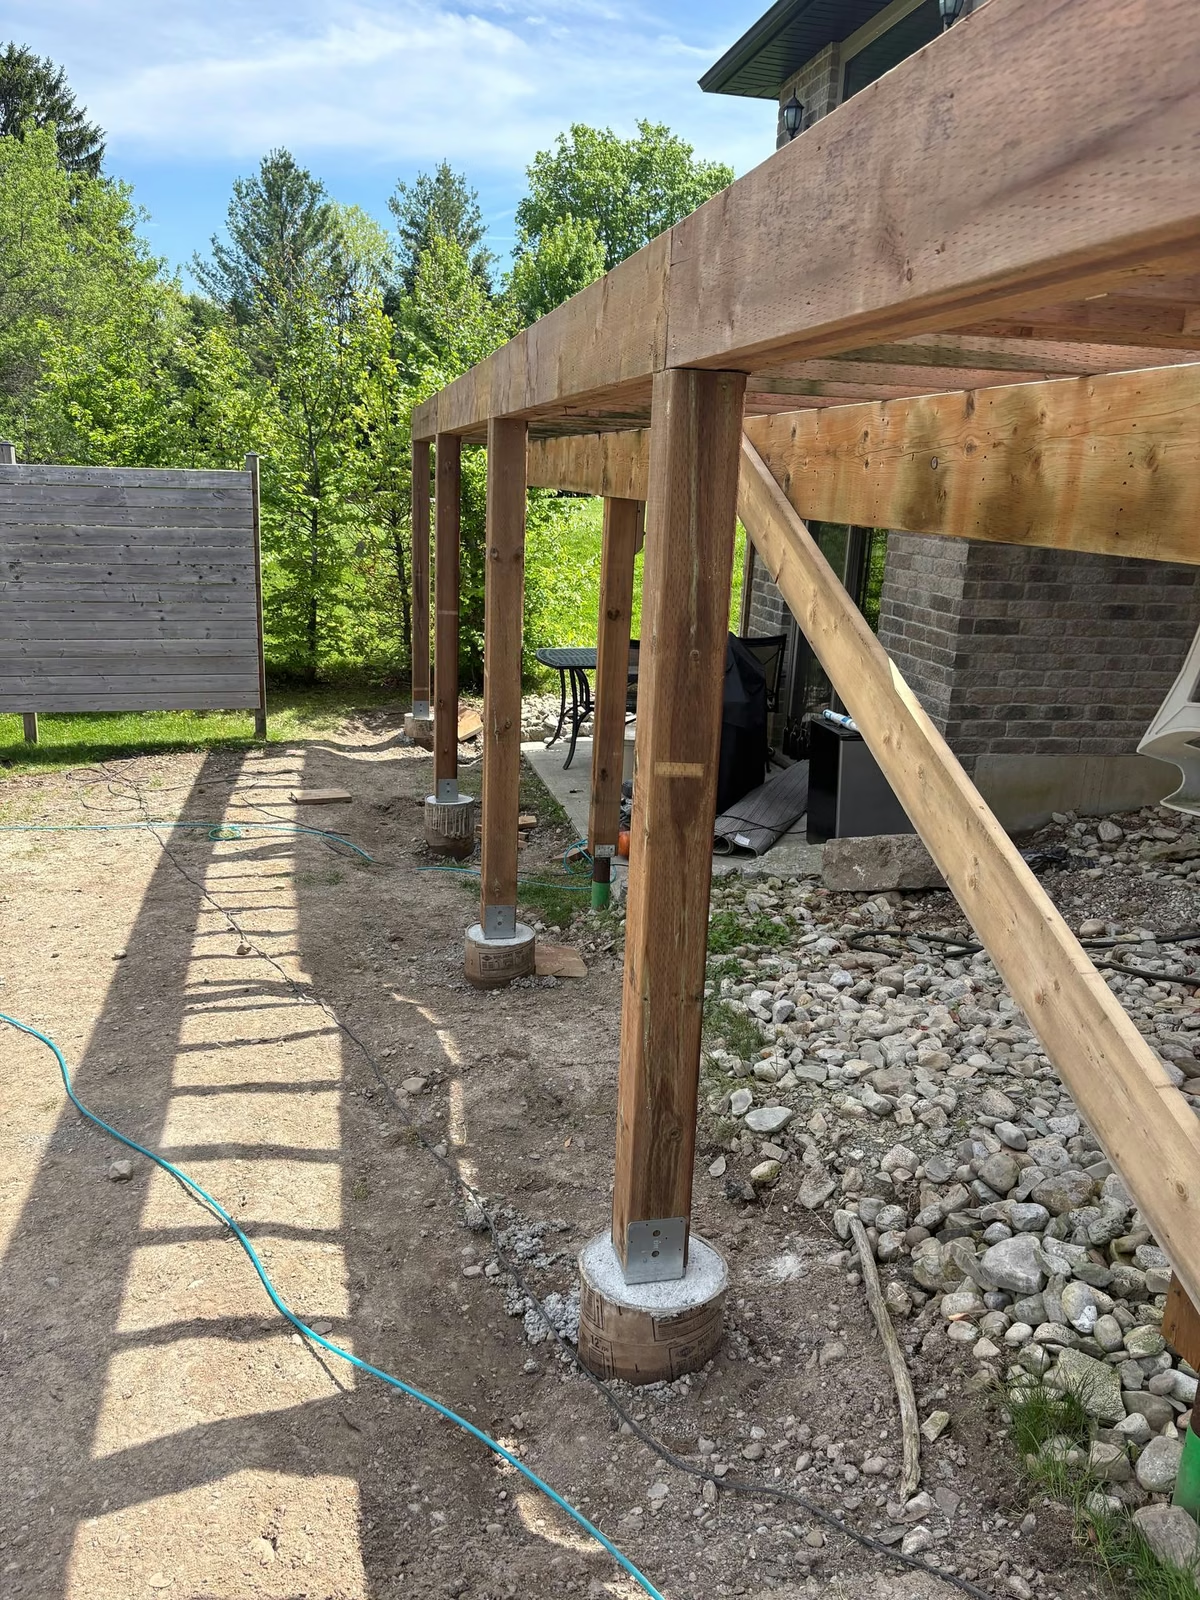
Framing on an elevated foundation
Framing materials — hardware, carriage bolts, wedge anchors, cap posts — were staged and cross-checked against the material list before the crew broke ground on the structure itself. Posts, beams, and connectors went into the footings first, followed by a new beam, the subfloor, and an extended section of deck framing. Exterior 2×6 walls went up over the following days, with an RFI raised on-site over the post-and-beam detail near the patio doors — the drawings didn't fully spec that connection, so it was resolved in the field with the engineer before framing continued. The fireplace bump-out was framed to spec alongside the rest of the shell.
When the ceiling opened up to reveal a set of roof trusses nobody had planned around, the answer wasn't to wing it — it was to sister new framing to the existing chords, get engineering sign-off, and only then cut anything back.
That's exactly what happened partway through roof framing: opening up the ceiling area revealed existing trusses beneath the peak, an unexpected condition the original framing plan hadn't accounted for. Work paused while a remediation plan went to the project engineer — remove the shingles and roof sheathing to expose the trusses, sister new 2×6s to the existing ceiling chords running exterior wall to exterior wall, and only cut the trusses back once the new members were confirmed fully load-bearing. The engineer approved the approach on review, and the crew proceeded with sistering first, cutting second.
Getting the roofline watertight
With the structural question resolved, the existing hip roof over the addition footprint was demolished and roof framing continued — fascia and gutters removed, sheathing installed, and 19 bundles of shingles, 3 rolls of ice-and-water shield, and 2 bundles of ridge cap delivered to site. Framing inspection passed with the County of Brant on the first attempt. A later roofing upgrade added shingles, underlayment, and labour beyond the original allowance, and flashing kits were purchased for the two new skylights once field measurements confirmed they'd sit directly in the framed openings without extra flange kits.
Coordinating the mechanicals
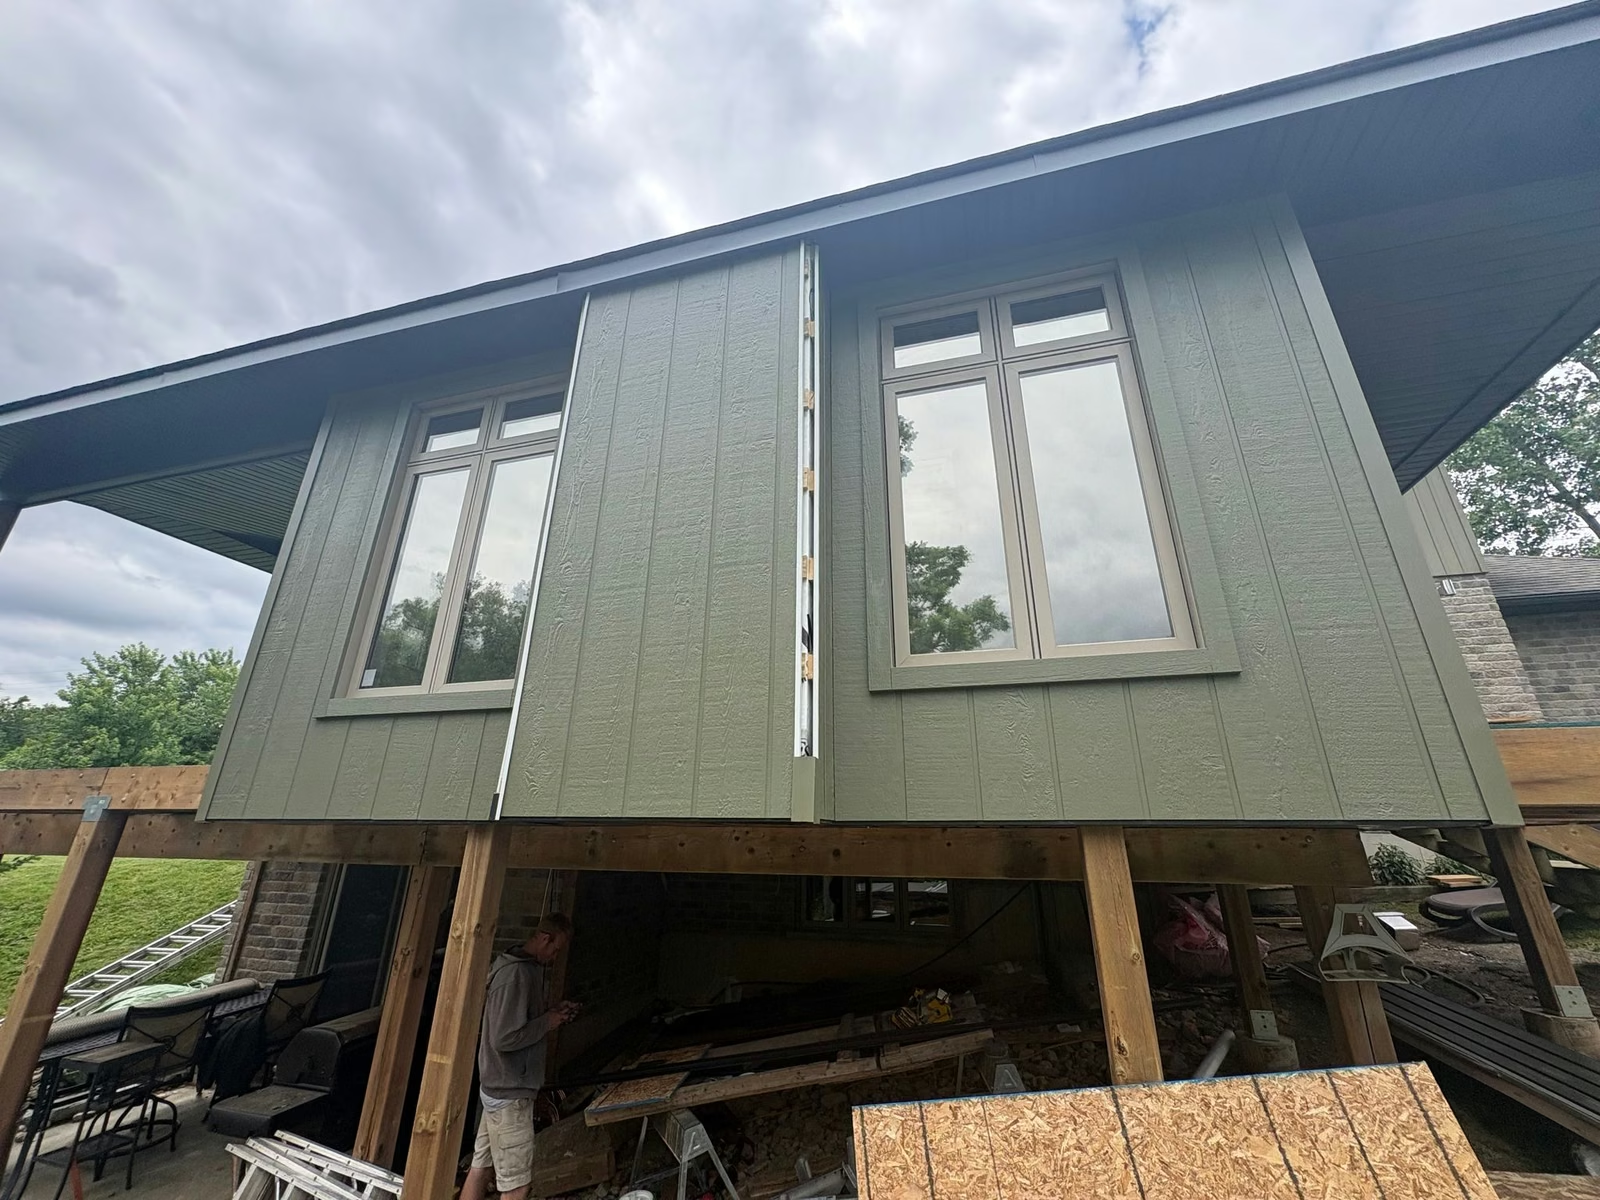
The HVAC contractor met the crew on-site to work through three items before rough-in: the existing fireplace vent, which now sat beneath the new roofline and needed a 90-degree redirect out through the roof; the ductless split, with the interior head confirmed for the wall beside the window between the brick and the kitchen sitting area and the condenser fastened to the brick wall below the deck; and the new gas fireplace at the bump-out, which meant relocating gas lines and the chimney. Exterior sheathing was deliberately left open in one section until the line set was pulled up through the wall cavity, so drywall could still proceed inside without waiting on that step.
Exterior finishes
Siding, soffit, and fascia went on as drywall boarding wrapped up inside — eaves, siding, and soffit were substantially complete within about a month of framing starting. A continuous layer of exterior foamboard insulation was added over the sheathing as an upgrade to the original wall assembly, and the underside of the elevated deck was finished with plywood, house wrap, and a prefinished vinyl soffit so the space reads as a finished ceiling from below rather than exposed framing. That underside structure is carried on new 6×6 pressure-treated columns sized specifically for the load.
One detail that came up late: the drywall returns planned at the window openings wouldn't work cleanly against the uneven brick framing underneath. The fix was MDF jamb extensions in place of drywall returns — a small change, confirmed with the homeowner on-site, that avoided a much larger framing correction.
The deck and stairs
The covered deck and stair system were rebuilt in True North composite decking, in a Brazilian Cherry tone the homeowner signed off on after reviewing the framing. Black aluminum railing was installed along the deck and down both stair runs, with a new stone landing poured at the base of the stairs. It's the kind of upgrade that's easy to add to the price of an addition already in progress, since the structural posts and stair stringers are already being built for the primary structure.
Interior finishes and the last details
Drywall boarding and mudding took longer than planned — the mud was slow to dry in the weather that week, and the poly vapour barrier seams weren't fully taped on the first pass, which would have failed the insulation inspection had it gone forward as-is. Both were corrected before sign-off. A roughly 2.5-inch floor height difference between the existing house and the new addition was resolved with a small transition ramp, colour-matched to the home's existing flooring rather than left as a visible step. Engineered hardwood and a porcelain tile transition were added to tie the new space into the home's existing floor plan, along with a full round of interior painting once the homeowner finalized colour selections. Locking hardware on the patio door and its fixed panel was prioritized ahead of a weekend the homeowner was away, so the addition could be secured before the rest of the finishes were complete.





What this project illustrates
Additions built onto an existing house rarely match the drawings exactly once the walls come open — a buried drainage line, roof framing that predates current expectations, a floor height that's a couple of inches off. What matters is having a process for the surprises: engineering review before any structural cut, a homeowner conversation before any visible change, and a documented change order before the crew moves past it. On this job that meant more than a dozen separately tracked change orders — from the exhaust hood relocation and expanded concrete foundation to the composite decking and flooring transition — each one priced and approved on its own, so the final scope stayed accountable from footings to final paint.
If you're planning an addition and want to know how a project like this gets priced and sequenced before the first hole is dug, start with a site visit. See also our additions and ARU page for the full picture of what we build.